Many beginner sewists often make the mistake of randomly cutting fabric without considering direction. Because of this, the final garment may twist and turn uncomfortably in the body, and generally look unattractive. It is not common knowledge, at least to beginners and casual sewists, that fabric properties change with direction. Therefore, to achieve a draping look that you may be going for, it helps to know and apply a bias cut.
What is “bias”?
Bias is the 45-degree angle that intersects the lengthwise and the crosswise grainlines of a woven fabric. Alternatively, it is a 45-degree angle relative to the selvage. Two true biases perpendicular to each other exist in woven fabric. While any cut that runs diagonal and is not on either lengthwise and crosswise grain can be considered a bias cut, pattern instructions generally refer to the true bias when they make mention of “bias”. Felt and other fabrics that are not woven do not have a bias.
Invented by the Parisian couturier, Madeleine Vionette in 1927, a bias cut is the technique of cutting on the diagonal grain (at 45 degrees) of the fabric as opposed to cutting on the straight and cross grains. The technique allows the fabric to drape in a way that creates a beautiful silhouette.
Still having difficulty picturing a bias cut? Imagine that gorgeous green dress that Keira Knightly wore in Atonement. That is a dress cut on the bias.

In Short…
- Bias – any diagonal grainline of the fabric, used to refer to the true bias in pattern instructions
- True Bias – bias cut at a 45-degree angle relative to the length selvage
- Selvage – the “self-finished edge” of fabric that is intentionally run through the mill to prevent the woven fabric from unraveling
- Grainline – the direction of the running thread relative to the selvage
- Lengthwise Grainline – pertains to threads parallel to the selvage. Also called the weft, this is the grainline referred to in pattern instructions. It has no stretch.
- Crosswise Grainline – pertains to threads perpendicular to the selvage. Also known as the warp, it has no stretch but might provide some “give”.
Why a bias cut?
Within woven material, true bias holds the maximum amount of directional stretch. It boasts of both stretchability and malleability so that the fabric will naturally drape itself. Cutting along the bias allows one to easily contour the fabric to the curves of the body, resulting in a garment that is flattering on the form.
Bias-cut garments look very different from ordinary garments, even when the same basic pattern is used to make them. They tend to delicately cling to the curves of the body compared to clothing that is cut normally, giving such garments a reputation of being sexier than traditionally-cut garments. As such, they are commonly used for sexy nightgowns and seductive dresses.
A good understanding of bias is reflected in the final product. Without proper bias, a garment may be challenging to create, impossible to wear, and unflattering. While it is true that a proper bias offers quite a forgiving fit, the fabric can be difficult to work with in the first place due to its instability, therefore it takes skill and experience to perfect working with a bias cut.
What fabrics are great for a bias cut?
The weave, weight, and softness of the fabric should be in total harmony for it to work well as a bias-cut garment. Generally, fabric that is woven using natural fibers works exceptionally well when cut on the bias grain.
As you may already know, silk is the best when cut on the bias. Satin and sheer fabrics like chiffons, gauze, crepe, georgette are also good when cut on the bias as are wool challis, soft cotton, linen, velvet, and lace.
Not all fabric works well with this kind of cut. As an example, the stiff organdy fabric would not look as well as silk when cut on the bias grain. Very heavy fabric with a tight weave also may not drape well. Polyesters and rayons may seem like the perfect fabric for bias cut but sadly they are not. They can work if you don’t mind the super stretch, but they can be super challenging to handle.
Finding the True Bias
To find the true bias, you can utilize a handful of techniques. First, you may use a straight edge. As previously discussed, the true bias runs 45 degrees relative to the selvage. Simply draw lines of equal length on both grainlines. Connect them. This is the direction of your bias.
You may also use your pattern to determine the bias of your fabric. Professional patterns include arrows indicating the lengthwise grainline. Simply arrange the pattern so that it matches that of your fabric grainline. Through it, the bias can easily be determined.
Finally, you can stretch the fabric to get a feel where it is most flexible. Using your fingers, stretch the fabric in opposing directions. Slowly work around in a clockwise manner until you get a feel where there is maximum stretch. Mark it as your bias using a fabric marker. While this method does not guarantee the exact determination of the true bias, it helps approximate it. It is very handy to note that the lengthwise grain will virtually have no stretch, whereas the crosswise grain will have a little give.
Sewing on the Bias
So you finally decided to overcome your fear of the bias and try sewing it… Because it is a highly technical cut, cutting and sewing on the bias are successfully done by following certain rules and guidelines. The most important thing to keep in mind when sewing a bias cut garment is the fact that the fabric will stretch differently compared to fabric that is cut the normal way.
Bias-cut garments are more difficult to sew than normal garments because of the diagonal fall of the fabric. If the garment is not made properly, the seams and hems can bunch and twist, instead of lying beautifully on the wearer’s body. For a well-fitting garment cut on the bias, read our few tips and tricks for you…
Starting simple
Sewing garment cuts on the bias can be overwhelming at the start. Therefore, it is best to keep things simple. Choose a pattern that is simple enough and that you are comfortable sewing.
Steer clear from fussy garments that come with extra design details such as yokes or darts as the inherent stretch of the bias will already provide shaping and ease. Other fabrics to avoid are heavy-weight canvases, twills, and stretch fabric. Also, avoid stripes and plaids as these need matching especially if there is a center seam. This requires more skill. Slippery fabrics such as rayon or silk can add complexity to your sewing as well, so try to keep the seams to the minimum.
As our recommendations, cotton lawn, plain weave linen, or wool challis are excellent options for your first time sewing a bias garment. As they say, start small and gradually build on your skills as you learn working on the bias.
Proper Cutting and Layouting
When cutting a bias-cut garment, you must take your time in order to avoid mistakes that can affect the quality of your work. Plan and calculate the yardage accordingly as you will definitely need more fabric. Lay your pattern open on the fabric and mark the bias accurately. Your garment can pull unattractively on the body even if it is only slightly off the true bias.
Additionally, make sure that all your pattern pieces are full and are not cut to be placed on the fold. It is better to cut the pattern in a single layer rather than folded as the fabric has a chance of slipping and distorting when cut. If it is intended to be cut on the fold, cut one half and flip over the centerline to cut the other side. Make sure your pattern also has a bit more ease than that for a straight grain cut. This is especially helpful if you are on the curvy side. In place of the traditional 2-3 inch ease, something like 6-inch ease will suffice.
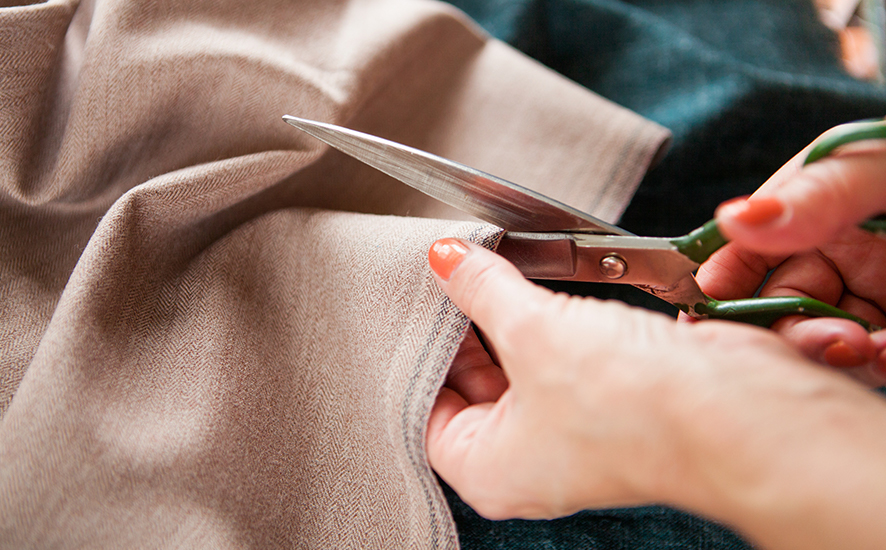
To cut the fabric, you can use either a rotary cutter or a pair of scissors. If you are comfortable using a rotary cutter, a combination of pattern weights and pins can be handy. If you are going to use fabric shears, placing tissue beneath your fabric can assist you in the cutting by adding stability.
Best to cut the front and back biases perpendicular to each other as this results in a balanced garment. Cutting on parallel biases makes the dress twist around the body. The bias should alternate around the body if the garment has center front and back seams.
After cutting the fabric on the bias, ensure that you are not stretching it further to prevent it from sagging out of shape.
Stabilizing
For best results, make sure to sew roughly 1/8” in from your seam allowance. Where closures are to be added, use fusible knit interfacing to stabilize areas. Knit fusible has a small amount of give that can accommodate the stretch of the bias. Alternatively, you may also cut woven fusible interfacing on the bias. The neckline is an area that can benefit from interfacing.
Constructing the Seam
Seams may bust if they do not stretch with the fabric. As you know, bias-cut garments tend to stretch over time. Therefore, it will help if you give at least a 1-inch seam allowance to all your seams. It also helps to create a seam that stretches along with your garment.
In this regard, a narrow zigzag stitch (ideally with a length of 2.5 mm and a width of 0.5 mm) will be superior to a standard straight stitch. This will allow the stitching to accommodate the stretch introduced by a bias-cut garment. This also guarantees that your garment will last longer. As you sew, you may need to stretch the seams a little bit.
When cutting certain fabric on the bias, a center seam may also be necessary. As you know, fabric stretches differently on the lengthwise grain and crosswise grain. Cutting the pattern with a center seam allows the pieces to be cut from the same grain, leading to a beautiful chevron effect.
Proper Handling
Many people tend to pull the fabric as they sew. This can result in rippled seams and a stretched-out garment. To avoid this problem, use a light hand and simply support the weight of your fabric without necessarily pulling it hard.
We also cannot stress enough the importance of properly pressing the seams. Use a pressing ham on shaped seams. In tight spaces, use a seam roll or a sleeve board. Ironing can destroy the grain of the fabric by stretching and distorting it. When working on the bias, this can pose several problems. Therefore, ironing should be minimized especially when working with bias seams.
Proper pressing, along with using suitable tools, will allow you to maintain the shape of your garment as you progress with your sewing.
Storing
Store the pieces flat as you progress with sewing your garment. It will reduce the need to iron the wrinkles out thereby avoiding any unnecessary stretching. Compared to hanging, storing your garment flat also leads to reduced stretching.
Settling of the Fabric
After you have finished sewing the garment and just before hemming it, hang it overnight to allow the fabric to settle naturally. This will even out any unnecessary and unwanted stretch. You can then trim any dropping areas or hanging fabric and proceed to hem.
Another way to allow the fabric to settle is by hanging your garment from a dress form. This is especially useful if you have a garment that incorporates a lot of seaming and shaping. The dress form helps mold the dress while allowing the hem to settle. This way, you end up with an elegant garment with a hem that is even.
Hemming and Finishing
With the bias-cut fabric, hemming can be a problem at times. Use a bias facing to finish the necklines and armholes. To prevent sagging bias-cut edges, use a bias binding which is cut on a different bias than the cut edge.
While sewing on the bias for the first time can be tricky, building your skills and challenging yourself constantly is a great way to learn this highly-technical yet gorgeous cut.